Skip to content
Product
FeaturesEverything the app does, feature by feature IntegrationsWorks with your gate, security and managing agent AGM meetings and votingQuorum, proxies and votes, in the hall or online PricingFrom R10 per property per month
Who it’s for
Trustees and directorsRun the scheme without the WhatsApp chaos Estate managersOne dashboard for the whole estate Property managersOne portal for the communities you manage ResidentsGet the app for your estate PartnersFor access control and security providers
Resources
BlogArticles on running a community scheme
Help Contact
Log in
Residents and estate managersLog in to your estate Property managersFor managing agents
  1. Help centre
  2. Guides
  3. Add document folders and upload documents
Search the help centre
Guide

Add document folders and upload documents

Create a folder under Community Documents, choose which residents can see it, then upload documents. Only managers can add them.
Checked for app version 4.37.1Updated 12 November 2026

In short
  • Find Community Documents under INFO, then tap Create Folder.
  • Name the folder and set Visibility: Owners Residing, Owners Renting, Tenants and Additional Users. Admins is always on.
  • Open the folder and tap + to upload a document. Only managers can add documents.
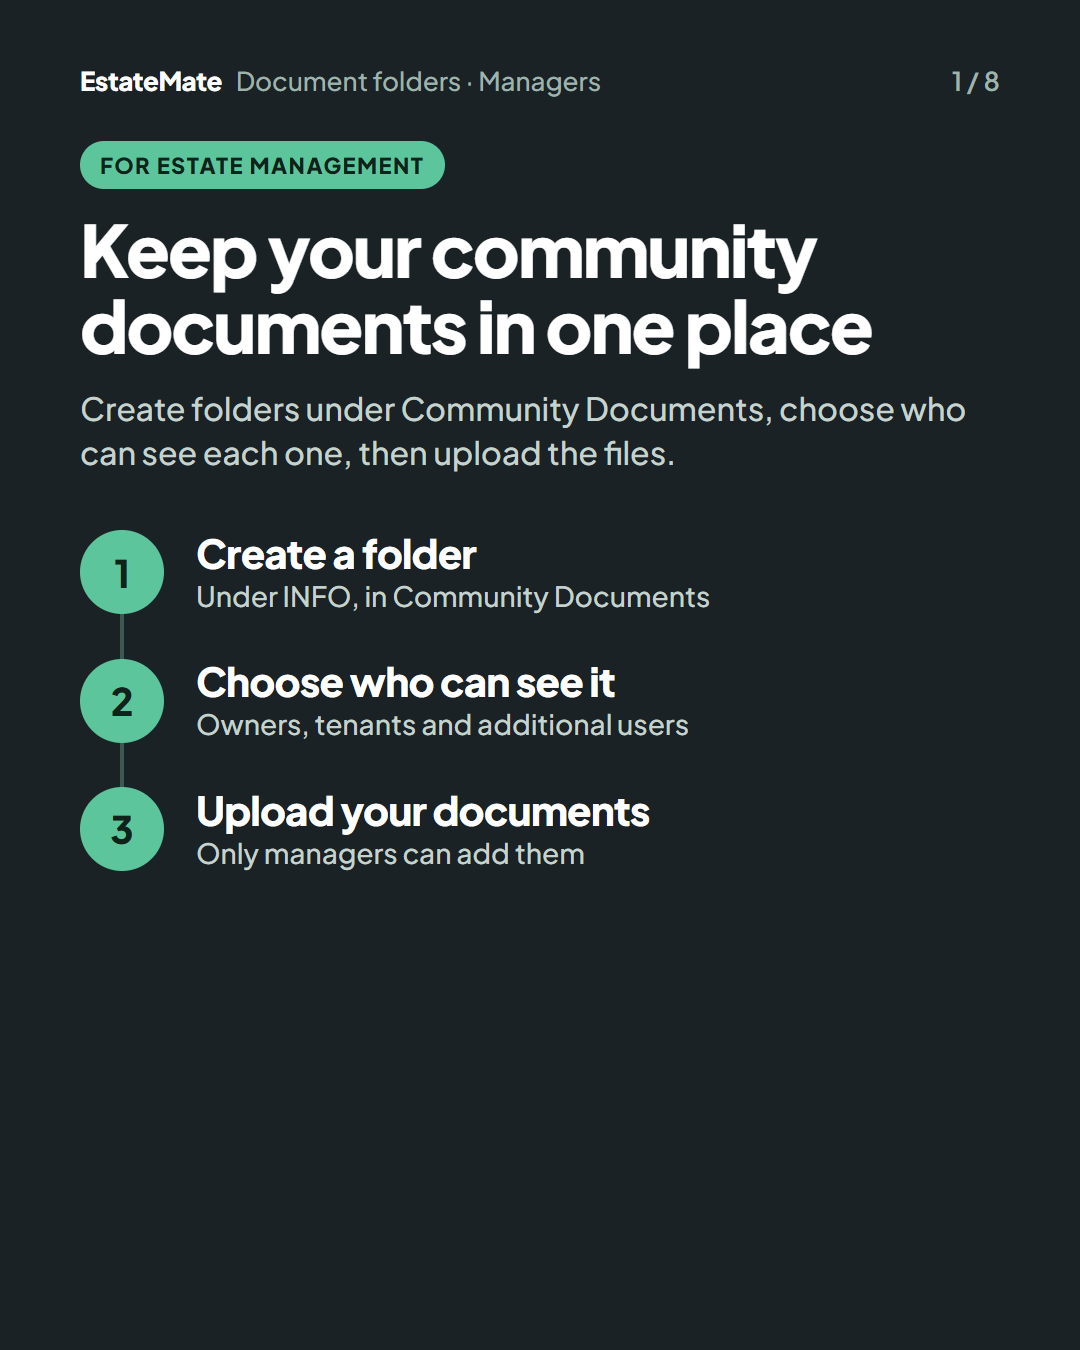
  1. Keep your community documents in one place

    Create folders under Community Documents, choose who can see each one, then upload the files.

    1. Create a folder. Under INFO, in Community Documents.
    2. Choose who can see it. Owners, tenants and additional users.
    3. Upload your documents. Only managers can add them.
    Cover card on a dark background with three numbered steps joined by a line: create a folder, choose who can see it, upload your documents.
  2. Step 1: find Community Documents under INFO

    1. Tap INFO at the bottom of your home screen.
    2. Scroll down past the contacts and the map to Community Documents.
    3. Tap Create Folder. It is the grey folder, first in the list.
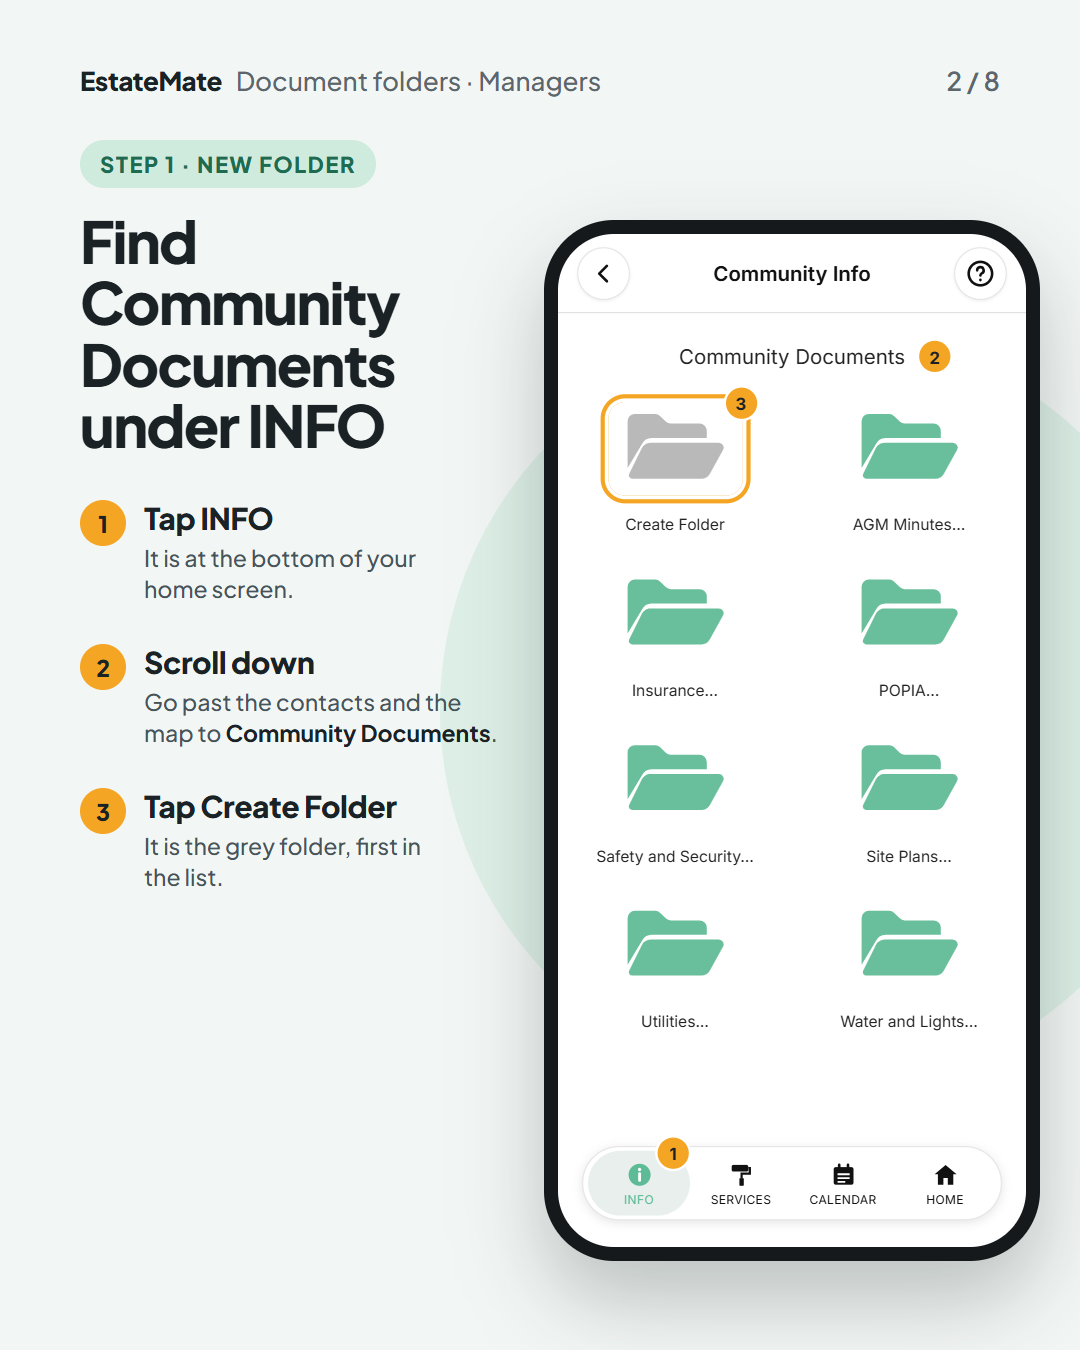
    The Community Info screen showing Community Documents as a grid of folders. Marker 1 is on INFO in the bottom bar, marker 2 is beside the Community Documents heading, and marker 3 is on the grey Create Folder icon, which is circled. Sample green folders follow: AGM Minutes, Insurance, POPIA, Safety and Security, Site Plans, Utilities, Water and Lights.
  3. Step 2: name the folder and choose who sees it

    1. Type a folder name, for example Rules, Insurance or AGM Minutes.
    2. Under Visibility, switch on each group that should see the folder: Owners Residing, Owners Renting, Tenants and Additional Users. Admins is always on.
    3. Tap Create. Your folder now shows under Community Documents.
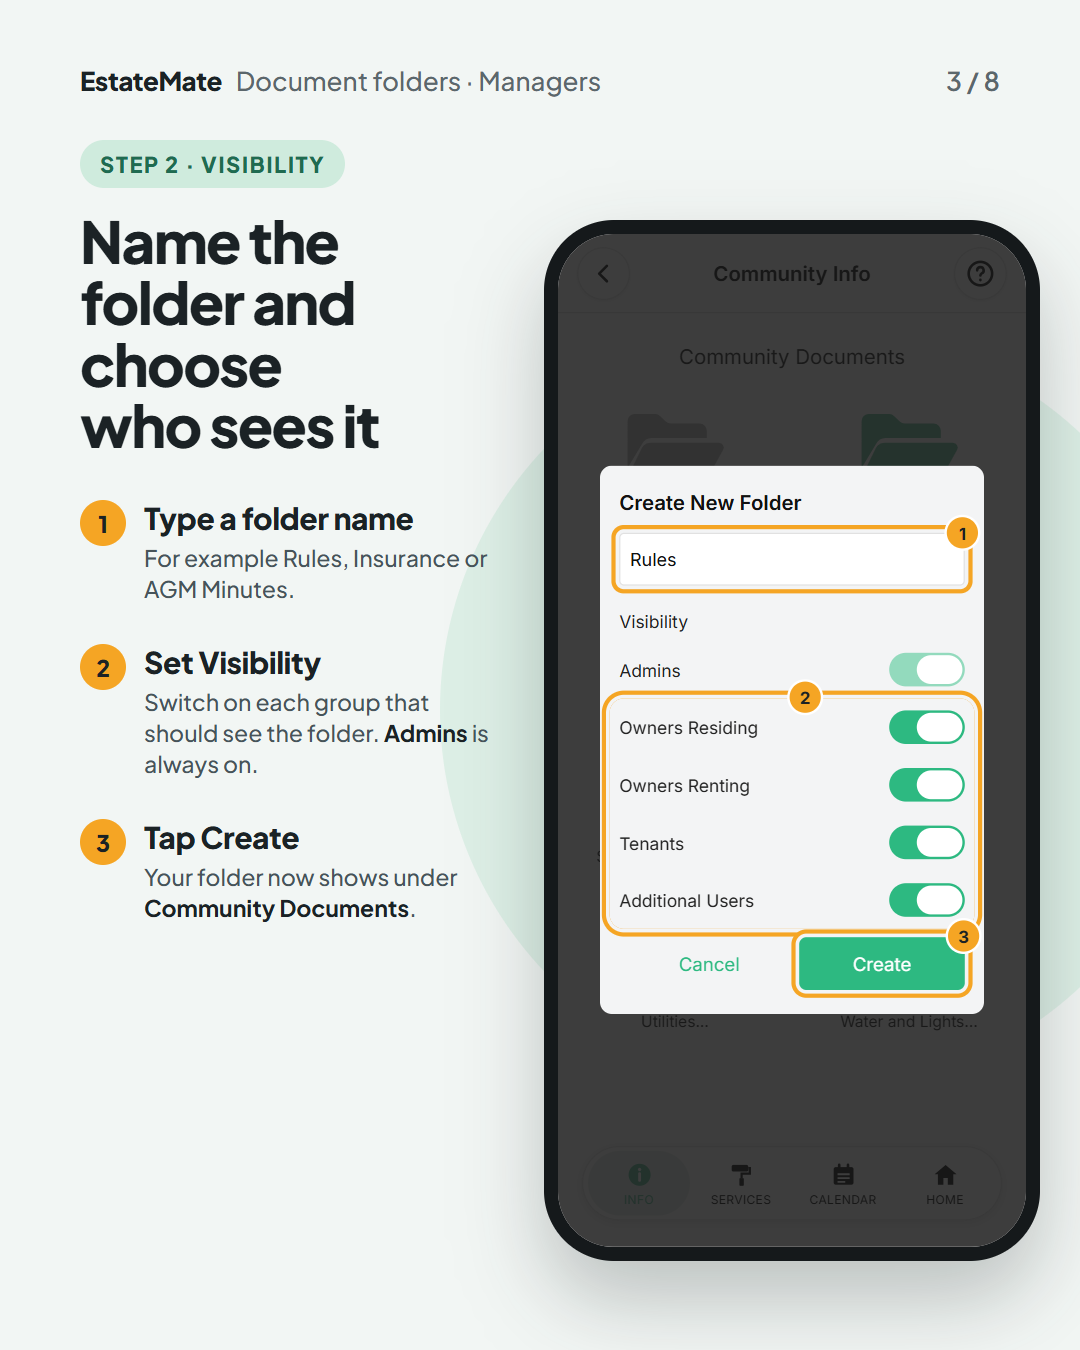
    The Create New Folder box over a dimmed screen. Marker 1 is on the Folder Name field, filled in with Rules. Under Visibility, the Admins switch is on and faded. Marker 2 is on the circled switches for Owners Residing, Owners Renting, Tenants and Additional Users, all switched on. Marker 3 is on the circled green Create button, next to Cancel.
  4. Good to know: each folder has its own Visibility

    A group that is switched off does not see the folder.

    Shared with residents: switch on each group that should see it: Owners Residing, Owners Renting, Tenants, Additional Users.

    Admins only: leave the other switches off. Only Admins see the folder, so use it for documents residents should not see. The Admins switch is always on.
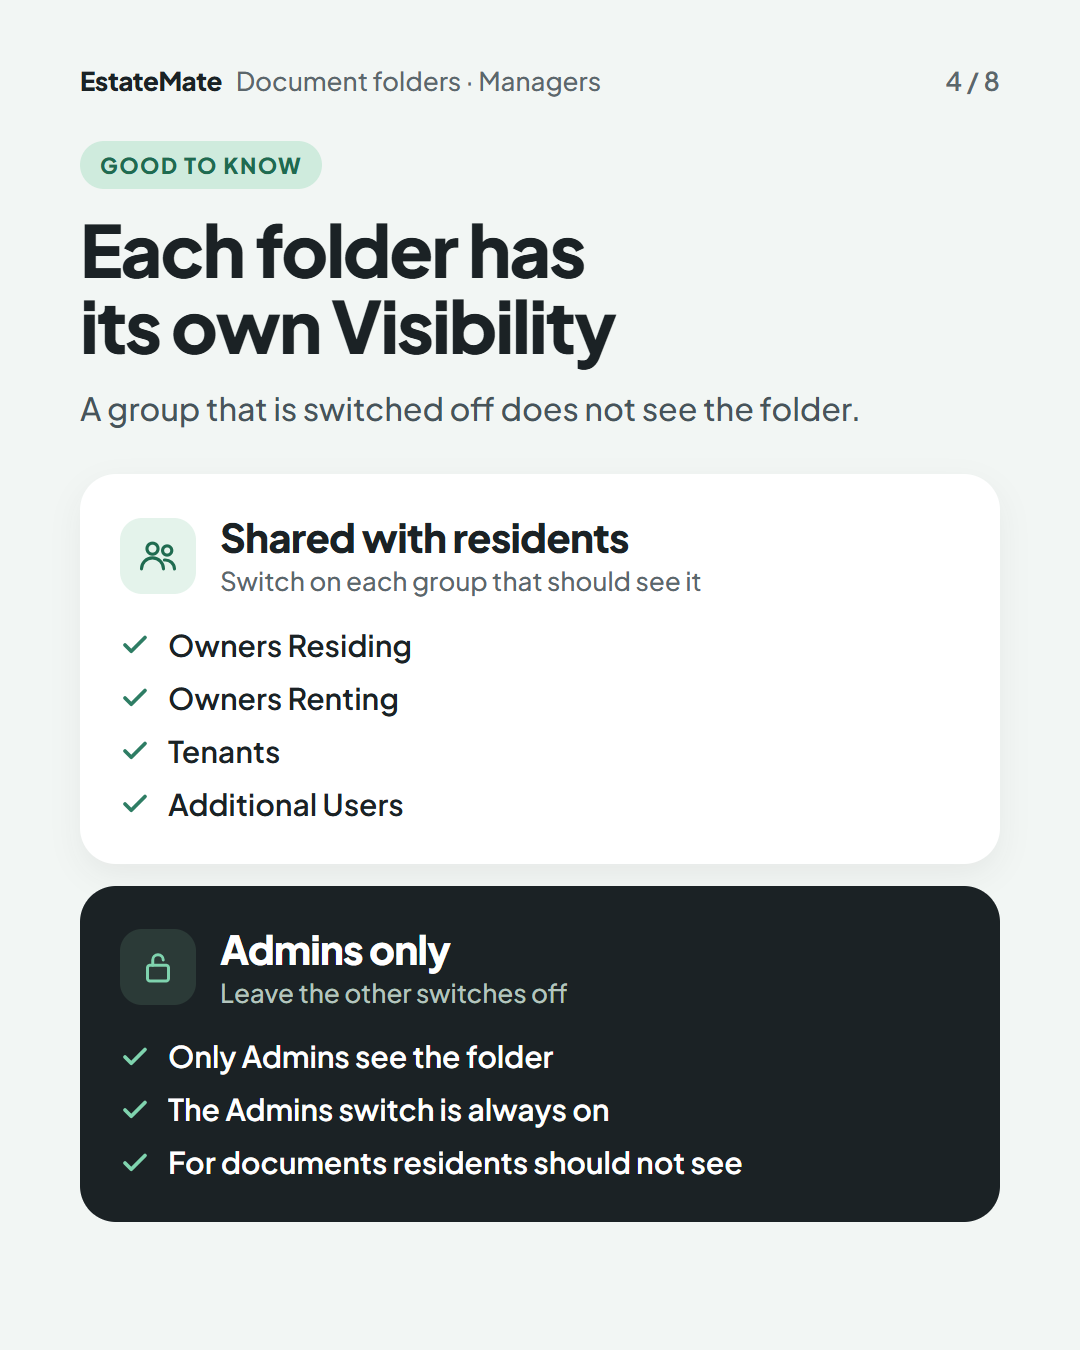
    Two stacked panels. The white panel, Shared with residents, lists four ticks: Owners Residing, Owners Renting, Tenants, Additional Users. The dark panel, Admins only, has three ticks: only Admins see the folder, the Admins switch is always on, for documents residents should not see.
  5. Step 3: open your folder and tap the + button

    1. Tap your new folder under Community Documents. A new folder is empty and shows "No documents in this folder".
    2. Tap the pink + button at the bottom right, then choose the file on your phone.
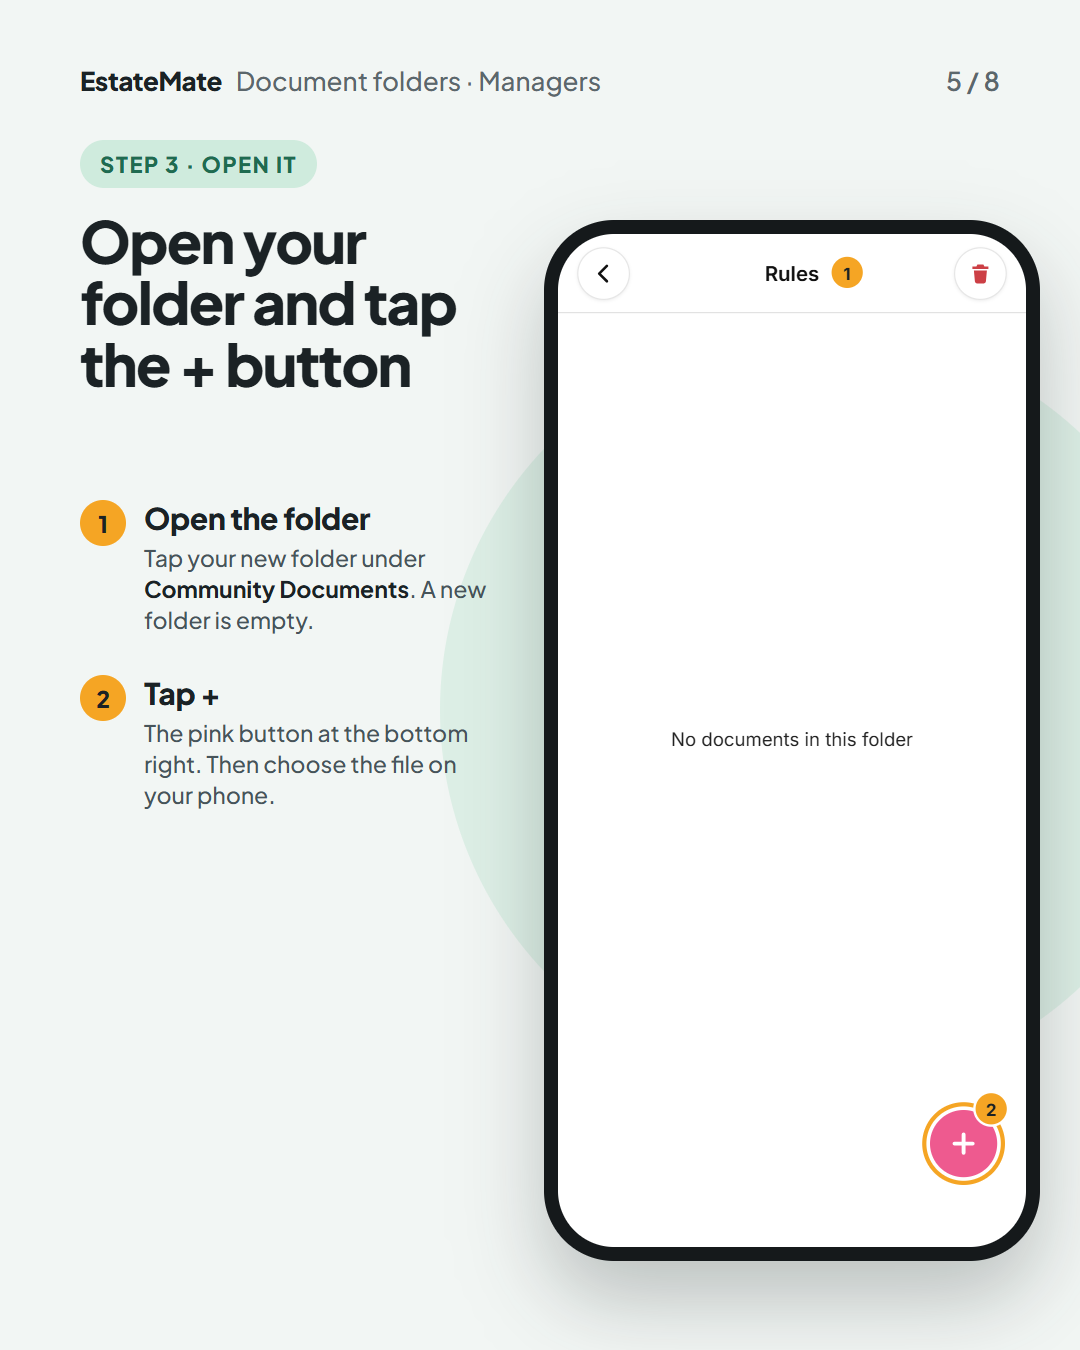
    The new folder, named Rules, open and empty, with the words No documents in this folder. Marker 1 is beside the folder name at the top. Marker 2 is on the circled pink plus button at the bottom right. A red bin icon is at the top right.
  6. Step 4: name the document and tap Upload

    1. Check the name in the box. It starts as the name of the file. Change it to a name people will recognise.
    2. The green bar shows the file you chose, with its size underneath.
    3. Tap Upload. The document is added to the folder.
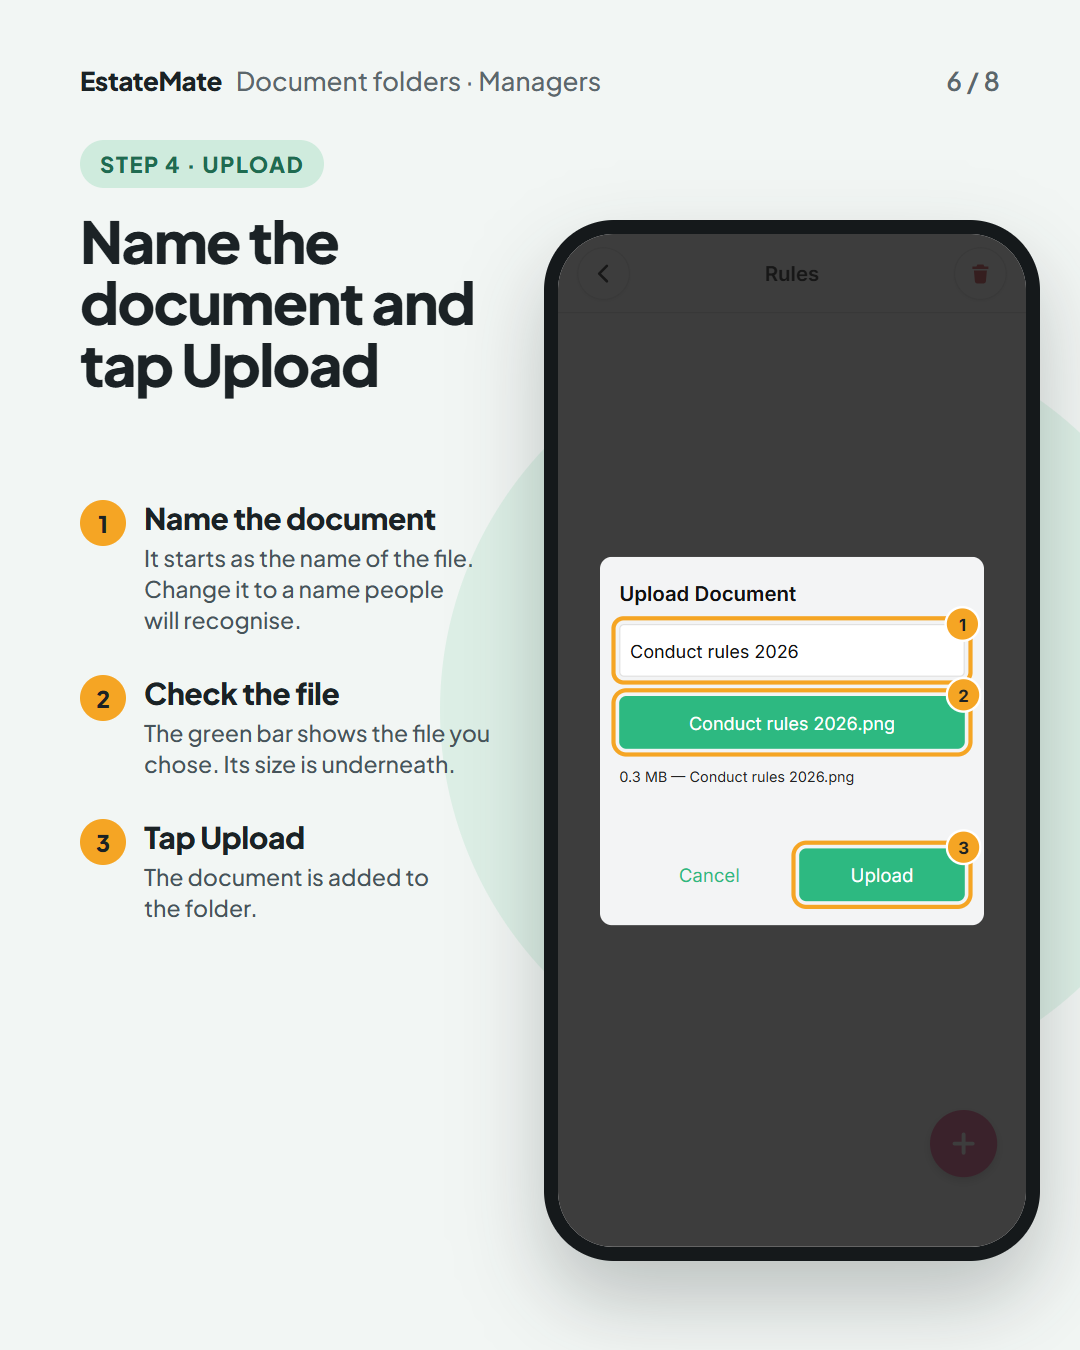
    The Upload Document box over a dimmed screen. Marker 1 is on the name field, showing Conduct rules 2026. Marker 2 is on the green bar showing the file name Conduct rules 2026.png, with 0.3 MB and the file name underneath. Marker 3 is on the circled green Upload button, next to Cancel.
  7. Done: your document is in the folder

    Each document shows its name and the date it was uploaded. Tap + again to add the next document.

    Only managers can add documents. Everyone you switched on under Visibility can see the folder.
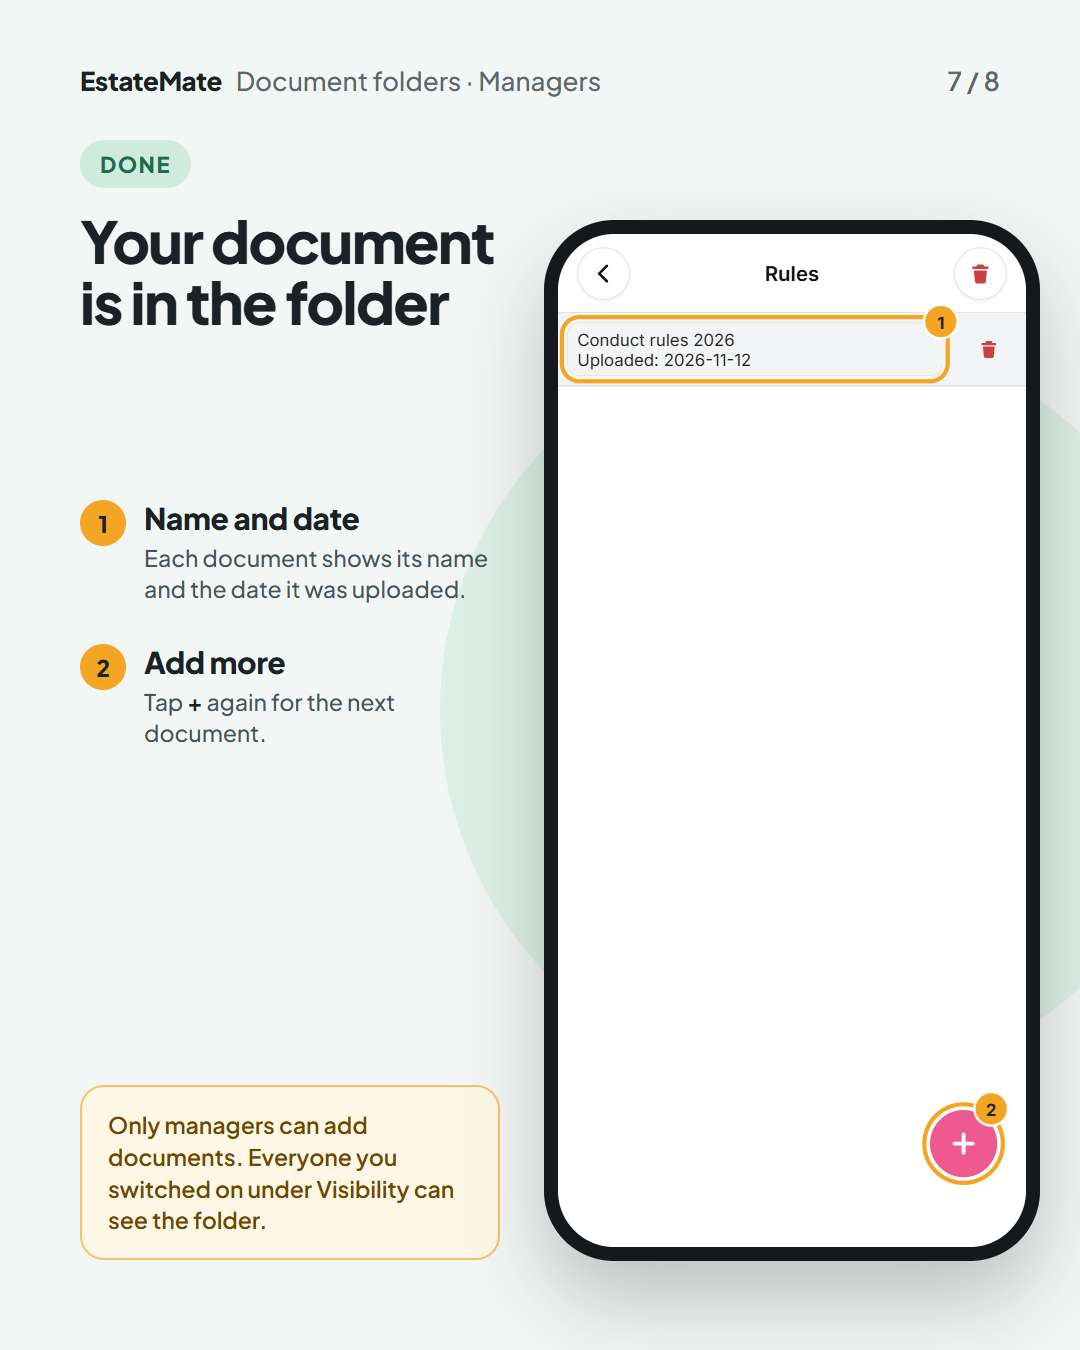
    The Rules folder with one document row: Conduct rules 2026, Uploaded: 2026-11-12, with a red bin icon on the right. Marker 1 is on the circled document row and marker 2 is on the circled pink plus button. An amber note says only managers can add documents.
  8. We can help

    Not sure how to arrange your folders, or who should see what? The EstateMate team can set it up with you. Email us at support@estatemate.co.za.
    Closing card on a dark background: Need a hand with your folders?, a Get in touch box with the support email address, and the sign-off Thank you for keeping your community informed. The EstateMate team.

Still stuck?

Send us a request. We’ll know you were reading this guide, so you won’t have to explain where you are.

Submit a request